Sunday, May 20, 2012

Red-y for Summer

Ah, yes.  It has been over a month since my last post.  I almost forgot I decided to do a blog.  Oops.  Oh well.  I'm back.  I know you've missed this.  Anyway, let's get on with it. 


Red Curry Recipe
adapted from Thai Kitchen

1 tbsp olive oil
1 can (14 oz.) coconut milk
2 tbsp red curry paste
1 tbsp brown sugar
1 lb chicken breast
1 cup (or more if you're feeling super healthy) assorted vegetables
1/4 cup fresh basil leaves
2 tbsp fish sauce


1.  Put the olive oil in a wok or large skillet over medium heat.  Cut the chicken into strips or small chunks.  Once the oil is hot enough (when you flick water into the oil and it sizzles) place chicken in pan and cover.  Cook chicken for 7-9 minutes on each side, or until mostly cooked through.  Set chicken aside.

2.  Cut up assorted vegetables into large bite-size pieces and place in skillet.  Cover, and cook vegetables for 7-9 minutes.  Set vegetables aside, and dispose of leftover oil.


3.  Bring coconut milk to simmer in large skillet (or wok) on medium heat.  Stir in curry paste and sugar until well blended; bring to boil.  Reduce heat to low and simmer for about 5 minutes.

4.  Stir in chicken and vegetables.  Cover, and cook for 15-20 minutes.  Stir in basil leaves and fish sauce.


5.  Serve with rice (Jasmin or long grain white rice).  Garnish with additional basil, and add Sriracha for heat (if so desired... I always desire it).

Although I realize this recipe is the opposite of summer since it's curry, this recipe is so darn easy and delicious to make that you won't really care.  As long as you have an air-conditioner unit or a fan blowing, you'll be able to enjoy this curry sans heat exhaustion.  The difference between my curry and the Thai Kitchen recipe is that I enjoy using red, orange, and yellow peppers as the "assorted vegetables."  Also, you don't need to cook the whole dish for 15-20 minutes, I just like the chicken and veggies to soak up all the coconut milky flavor and turn into kind of a curry stew.  The longer you keep the dish simmering, the richer the flavors will become, and the more tender the chicken.  This dish reminds me of the shining sun in the summertime.  Now that it's hot out, we can all enjoy the delightful weather and the NYC garbage smell emanating from the sidewalks.


Happy (almost) summer everyone.  Here's to the last summer before the world ends... apparently.

Monday, April 9, 2012

Easter meets Passover... meets Good Friday

Happy Monday to you all... this means the fresh start of a new week.  Sunday doesn't count.  You can now accomplish new things this week, folks... and all because it's Monday.  Anyway, I contemplated making eggs in some creative fashion as a nod to both Easter and Passover (Seder plate) and then putting it up on my blog, but then I thought maybe I should do something I haven't done in awhile: post an outfit.  After all, this is a multifaceted blog.  Yes... I should explore my horizons and whatnot.  I promise I'll still cook things and post pictures of delicious food finds, my devoted readers (all 6 of you).  For today, I wanted to put up a picture of an outfit that is a nod to "mid-western meets ballet"... or (in this case) "Easter meets Passover.... meets Good Friday"...what? These holidays have passed, you say?  Well, good riddance.  Sometimes I confuse Good Friday with Ash Wednesday, but then I realized that I didn't see anyone on Friday who looked like they fell asleep in a fireplace. 
On that note...
American Apparel skirt, Target for little girls white tights in a large, Longchamp bag, My mother's belt, White button down shirt stolen from my sister, Forever 21 sweater, Forever 21 necklace, Xhiliration for Target "leather" jacket
On that note, I'm off to Pinkberry.  May you never confuse one holiday for another, therefore offending a religion.

Thursday, March 22, 2012

Oh, you fancy huh?

Hello there!  So, this will be kind of a short one because I made a promise to myself to go to sleep before 1 o'clocky tonight.  And I took a sleeping pill, so hopefully this recipe remains more coherent than the St. Patty's Day one.  All right!

Goat Cheese and Arugula Pizza with Caramelized Onions

1 (8 oz.) package of goat cheese
2 small handfuls arugula (also known as "rocket")
1/2 red onion (roughly chopped)
3-4 basil leaves
olive oil
1 pizza crust (or you can make your own if you're not lazy)
pepper

1.  Preheat the oven to the temperature your pizza crust package tells you to turn it to.  Mine said 425 degrees.
2.  Put the oil and onions in a medium skillet and cook over medium heat, stirring occasionally, until onions are soft and caramelized, about 7-10 minutes.
 3.  Put pizza crust on a pizza pan or baking sheet, and lightly brush the edges of the pizza crust with olive oil.
4.  Sprinkle goat cheese all around pizza, but leave about an inch to an inch and a half uncheesed around the edges.  Then sprinkle the arugula (rocket), basil leaves, and caramelized onions all over the pizza.  Crank some pepper on that puppy.
5.  Bake the pizza for about 8-10 minutes (or whatever the pizza crust package tells you) and enjoy!
 
This is so effortlessly, deliciously awesome.  And it's so easy to make.  And it's really not too unhealthy for you... as long as you're sharing.  Goodnight you princes of Maine, you kings of New England.

Friday, March 16, 2012

A Literal Irish Car Bomb


Top o' the mornin' to ya!  Let me preface this entry by saying that my baking this past evening was not a success.  I tried to do something delightful and St. Patrick's Day related, and it kinda blew up in my face a bit.  Firstly, if you decide to follow this recipe you will almost certainly end up with some rock cupcakes that taste like beer.  On that note, at least they came out pretty, and the frosting was goodish.

Artistic
Blarney Stone Cupcakes (i.e. chocolate stout Guiness draught cupcakes)
adapted (loosely... very loosely) from Food Network

3/4 cup hot cocoa powder (poor choices)
2 cups sugar
2 cups flour
1 teaspoon baking soda
Pinch fine salt
1 bottle tall can stout Guiness Draught beer (poorer choices)
1 stick butter, melted
1 tablespoon vanilla extract
3 large eggs
3/4 cup sour cream

Oh, hello poop
Such poor choices
Okay, I am not going to write the steps because, as my friend and I were making these cupcakes, we (or rather I) did a poor job of following the directions.  I used hot cocoa powder instead of unsweetened cocoa powder, and draught dark beer instead of stout.  Stout is the only kind that should be used for baking- the end.  In addition, I don't really recommend following this person's recipe from foodnetwork.com because his recipe makes the cupcakes very runny (and the frosting he makes is runny and terrible as well... BAD RECIPE).  During the prep process I decided to add more flour and hot cocoa powder because I wanted to thicken up the batter.  Although the batter did thicken, once the cupcakes came out of the oven, they turned into little muffiny weapons.  Epic fail texture-wise, but flavor-wise they were okay.  At least the frosting was okay. Live and learn, people.

Bailey's and Cream Cheese Frosting

3-4 tablespoons Bailey's Irish Liqueur
1 (8 oz.) package of cream cheese, softened
1 1/2 cups confectioner's sugar


So you just mix everything together in a mixer for a couple minutes... that's about it.  I screwed up.  I'm sorry.  So I made something pretty instead:


 Yay!  Well, maybe I should branch out from cooking and have a good long hard think Winnie the Pooh style.  Goodnight... er good morning.  Happy St. Patrick's Day everyone!

Thursday, March 1, 2012

Spring Rollin' in The Deep


Hello friends!  Recently I was trying to think up some sort of dish that would best represent Leap Day.  Frogs' legs is out of the question because a) I've never eaten them, and b) I wouldn't trust myself with cooking them.  It's important to build up your culinary technique until you've reached the whole frogs' legs/hog roast/whatnot shenanigan skill level.  So, as I was cruising a delightful Vietnamese restaurant in midtown, I spontaneously decided to purchase spring roll skin.  Since I had made a stir fry earlier on in the week, I already had spices and veggies needed to create some splendid spring rolls.  So... without further ado.... let us SPRING into March!!!....puns are fabulous. Shutup.

Chicken and Veggie Spring Rolls

1 pack spring roll skins
1 chicken breast
6-8 basil leaves (minced)
3 medium sized carrots
1/2 red onion (chopped)
2 cloves garlic (minced)
soy sauce
paprika
garlic powder
ground ginger
light vegetable oil
Sriracha  (optional)

1. Heat a wok or large sauce pan to over medium heat, and drizzle about 2 tablespoons of the oil into the wok/pan.  Allow the oil to heat up before placing the chicken breast in the pan.  Throw a few dashes of paprika, garlic powder, and ground ginger over the chicken.  Allow chicken to cook for 7-8 minutes on one side before flipping it.  Season the other side of the chicken.  Once chicken has cooked all the way through (another 7-8 minutes), remove the chicken from the pan, and place on cutting board.  Then chop the chicken breast into very small pieces.  Coat chicken with 1 1/2 tablespoons of soy sauce and let it set for 5 minutes.


2.  After washing and peeling the carrots, use the peeler to peel (so much aPPEAL- HA!)... use the peeler to peel off small skinny strips.  In the same pan that you were just using to cook the chicken, add 1 1/2 tablespoons oil.  Don't worry about cleaning the pan, the remnants of the chicken and its seasoning will add to the flavor of the veggies.  Add basil, onion, carrot, and garlic to the pan/wok.  Stir occasionally for about 8 minutes, and then add the chicken into the pan.  Cook together (and season more) for a few more minutes.


 3.  Heat a separate frying pan over medium high heat, and add about 1/3 cup oil to the pan.  While you are waiting for the oil to heat up, start wetting some of the spring roll skins.  This is important because, in order for the skins to have elasticity to form into a spring roll, they first need to be moistened, and then laid out to dry on a flat surface for about 2 minutes .  Do not pile the wet spring roll skins on top of each other or you will have a gluey rice mess and you will probably still be hungry.


4.  Once the spring roll skin has dried (is no longer wet, but the skin is loose and elastic) scoop a heaping spoonful of the chicken and vegetable mixture onto the far side of the circular skin.  (Also, try not to include too much of the liquid left in the bottom of your wok/pan).  Make sure to spread the chicken/veg mixture out into a log shape.  Fold the bottom of the wrapper up over the filling and gently press down.  Fold in both sides of the wrapper, and gently press to seal.  Continue rolling the spring roll up towards the top of the wrapper.  If the wrapper won't seal, then sprinkle the top with a little bit of water.

Some rolls are bigger than others
 5.  Place the roll(s) in the heated frying pan.  Cook both sides of the roll for about 4-5 minutes or until golden brown.  Remove rolls from pan and place on a plate lined with paper towels.  This will drain the spring roll of its excess oil.  Let cool for 5 minutes.  Serve with duck sauce, soy sauce, hot chili sauce, hot mustard sauce, peanut sauce, Thai chili sauce, or (my favorite...you know it) Sriracha.

Having a moment with my love... Sriracha

Cooking the spring rolls was a little bit more difficult than I had anticipated... mostly because I made the recipe up while cooking, and mostly because I wasn't sure how much oil was appropriate to use.  I must note that I used a lot less oil than you're supposed to use while making spring rolls because I wanted a kind of healthier version.  Also, deep frying things over a gas stove and open flame terrifies me.  Goodnight!

Monday, February 27, 2012

Food Porn

All right, everyone.  Settle down.  Now, I need to let you know that what I'm about to show you, I did not make.  That came out weirdly.  These pictures are of foods that I have not made.... um.  You get it.

First of all, if you've never been to Allentown, PA then there are a few things you should know about it: 1. It involves the Lehigh Valley that makes everyone with allergies a complete mess of sniffles.  It's so funny.  2. Billy Joel sang a truly riveting song about it called "Living Here in Allentown" so that about settles that.  3. Allentown is pretty close to Amish country... which means good fresh produce.  4. Farmer's Market 
... and then there's a gem that comes out of left field... it's called Cali Burrito

I want one now

and even though I always think I'm overrating this burrito/taco "joint," each time I come back I'm like that was really friggin' good.  Not only do I think their tacos, burritos, and homemade salsas are delicious, I also think that the stoner puns in their name and menu descriptions are genius.  A high burrito surfing is their mascot... sign me up.

Secondly, I wanted to find a coffee place that has delicious coffee AND baristas who know what they are doing with their high tech coffee machines.  Look no further than Joe: The Art of Coffee. So I ordered a cortado which is a large espresso with a small amount of steamed milk.  That is a perfect drink, if you ask me.

You don't even need sugar cause the coffee speaks for itself.

And now..... I present.... Insomnia Cookies.  One has very recently opened up in my neighborhood, and it's the worst best thing that has ever happened.  Holy moly.  If you enjoy melty, barely-cooked, doughy hot globs of chocolate cookie, then this is the correct place for you to come and order 3 or a dozen.  It's a problem.


Hmmm.  Well, soon to come: how to make spring rolls, some sort of review of a movie eventually, and maybe something about clothes... Ah, well.  Goodnight!

Monday, February 13, 2012

The Heart of the Matter

Good morning!  Since Valentine's Day is tomorrow, I decided I wanted to bake something kind of cheesy.  I stumbled across this during my Youtube black hole-athon, and decided that it was a grand idea.  Let's get started shall we?

 Hidden Heart Cupcakes
adapted from Dessert Living Today

1 1/2 sticks butter, softened
1 1/2 cup granulated sugar
3 eggs
2 tablespoons baking powder
1/2 tablespoon baking soda
1 tablespoon pure vanilla extract
1/4 tablespoon salt
2 1/2 cups flour
1 1/3 cups whole milk or light cream
red food coloring or icing

Vanilla Buttercream Frosting
adapted from Food Network

3 cups confectioner's sugar
1 cup butter
1 teaspoon vanilla extract
1-2 table spoons whipping cream


1.  Preheat the oven to 350 degrees. Mix the butter and sugar together at medium speed until fluffy.  Add the eggs one at a time, mixing until mixture is creamy.  Add the baking soda, baking powder, salt, and vanilla, and mix until the batter is smooth.  Alternate between adding the flour and the milk, beating at a medium speed until the batter is smooth and creamy.  Remember to scrape down the sides of the bowl so that all the ingredients get combined.
2.  Pour 1/3 of the batter into another bowl.  Add drops of the red food coloring until you achieve your desired pink or red color.  Pour the batter into a non-stick or lightly greased 8x8 baking pan, and bake for 20 minutes or until the edges of the cake start to turn lightly golden.


3.  Allow cake to cool completely.  Once the cake is cool, loosen the edges with a butter knife, and invert pan onto a cutting board.  Using small heart-shaped cookie cutters, (or a knife in my case) cut a dozen cake hearts that are small enough to fit inside an average-sized cupcake pan.


yummy, yummy, yummy, I've got love in my tummy.


4.  Spoon two tablespoons of the remaining batter into paper-lined cupcake tins.  Put one heart into each tin and press (point down) into the batter.  Keep all hearts facing the same way in the pan.  Once all the hearts are in the tin, cover them with 2 more tablespoons of batter. Bake for 20-24 minutes (each oven varies).  Allow cupcakes to cool before frosting.  Once the cupcakes have cooled, remove them from the pan and set them on the counter with their internal hearts all facing the same way.

And I-ee-I will always love youuu-ooh-ooh-ooh

Onto the frosting!

1. In a standing mixer with a whisk, mix together sugar and butter on low speed until well blended.  Increase the speed to medium, and beat for 3 minutes.
2. Add vanilla and cream, and continue to beat on medium speed for 1 more minute, adding more cream until the frosting is at your desired thickness.
3. Add drops of red food coloring, and mix on medium speed until you achieve your desired pink or red color for the frosting.


With frosting the cupcakes I scooped the frosting into a zip-lock baggie and cut a 1 inch diagonal hole in the bottom corner of it.  After squeezing about 3 tablespoons of frosting onto each cupcake, I spread the frosting around with a butter knife until the cupcake was completely covered.  Then I sprinkled decorative heart sprinkles on top, and used cupid/heart toppers to complete the exceedingly corny look.  Also if you face the toppers the same way the internal cupcake heart is facing, then when you cut into the cupcake, the heart will be exposed!  If you forget which way the heart is facing and you cut into the cupcake incorrectly, then the inside just looks like a pink square- still festive, yet not really what we set out to do, ladies and chums.


But wait!!!  What do you do with the scraps from the pink cake/the leftover frosting?...  Why cake pops, of course!


Cake Pops
Leftover frosting
Leftover cake
Smidgen of whipping cream
Smidgen of water
Lollipop sticks
Melting chocolate
Sprinkles (optional)

1.  Mix the leftover frosting and cake together on medium speed for about 2 minutes.  Add a smidgen of water and whipping cream, and beat on medium speed until the mixture has the consistency of play-dough.


BAWLS

2.  Roll the dough into little balls and set on parchment paper.  Stick the lollipop sticks into the cake balls (teehee), and put the balls in the freezer for about 30-40 minutes (depending on your patience).  Since the lollipop sticks tend to pop out of the cake balls pretty easily, it might help if you melt a little bit of the chocolate and dip the tip of the lollipop sticks into the melted chocolate before inserting them into the cake balls.


3.  Take your melting chocolate and melt it either in the microwave or over a double burner.  Submerge the cake pops in the candy coating, and tap off any excess into the bowl.  When you're dipping your cake pops, you can either leave them to dry on parchment paper in the color you dipped them in, or you can add sprinkles to the cake pops before the coating sets.


Delightful! Now get to baking! Oh, and Happy Valentine's Day everyone!

Wednesday, February 8, 2012

When the moon hits your eye...


 Oh yum.  Oh joy.  Oh rapture.  I would like to preface this recipe by saying that it is one of the easiest things to put together... "cook" if you will.

Spicy Four Cheese Wrap Pizza (?)
1 tortilla wrap
1/4 onion chopped
1/2 cup tomato sauce
1/2 tomato chopped
A couple handfuls of (Reduced fat "Mexican") cheese
3-4 basil leaves (optional) 
A couple swirls of Sriracha (optional)


1. Preheat oven to 375 degrees and place the wrap on an ungreased baking sheet.
2. Wash onion and tomato.  Cut the onion into quarters, and chop 1/4th of it.  Cut tomato in half, and chop half of the tomato.
3. Scoop tomato sauce onto center of wrap and use the back of a large spoon to spread the sauce evenly over tortilla, but leave about an inch to an inch and a half unsauced around the edges for a crispy crust.
4. Sprinkle cheese, onion, tomato, and basil leaves on top of pizza.
5. Swirl Sriracha all over pizza.


6. Put pizza in the oven on the middle rack, and cook for about 10 minutes or until the sides of the pizza are light brown and crispy and your kitchen smells like pizza.
7. Remove pizza from oven and let it cool for 2 minutes.  Cut the pizza into quarters, and enjoy with an ice cold beer (if you're legal).


There.  That was so easy and delicious.  And kinda healthyish for you... right? Or atleast healthIER.  I think this is what Congress meant when they said that pizza is a vegetable.  It is... if you put veggies on it.  A couple things to consider while making this delight:


1. Red onions are wonderful.  They are up there, right above scallions.  Red onions are so beautiful and vivid in color and taste.  They can be put into anything and make it 20 times better. Magic chef.
2. Basil plants... um.  Yeah.  If you get one you will love it forever, and it won't stop growing.  It also is very resilient (cause I left mine unwatered for almost two weeks once, and it lived to tell tales and sprout babies).  Also, you can use fresh basil for EVERYTHING.  I feel like a farmer when I pluck the leaves off.
Good night everyone.


How to dress like a homeless person... and get dressed in the dark

Tretorn Rainboots; Madewell parka; Target for pregger ladies under shirt; Vintage Lacoste Izod men's sweater; Express leggings; Ann Taylor scarf; Gregory's coffee (for free if you make them a Valentine's Day card)
Some days you just look in the mirror (or don't) and say to yourself, Oh balls, I'm running late to work.  Never fear, my friends.  At that moment you should next say to yourself, What would Jesus do?  ...But seriously, a trick is to just think of the first piece of clothing or jewelry that pops into your cranium, and then build the rest of the outfit off of that one thing.  Don't second guess yourself.  You look GREAT.  It works wonders to just go with the flow when you don't have time to do a montage of your entire closet in front of your mirror.  In fact, sometimes it is better to dress in the dark.  If you continue to look at yourself and nitpick all of the little things you don't like about how your outfit looks or how you look in it, then you become self-conscious, and therefore are late to work.
Although this outfit featured above is not the most creative or posh, it's something I felt comfortable in today after dressing without looking in a mirror.  And sometimes, as I roam the streets of New York, I see this man dressed head to toe in the most beautiful colors of garbage (literally. He's homeless, and wearing colorful garbage) and I think, Man. He looks so cool, and he doesn't even give a shit about what he's wearing. Chicken soup for the soul.

Monday, January 30, 2012

This'll put some hairs on your chest...


Dear bloggers, friends, family, and anyone who has accidentally stumbled upon my blog,
Welcome to what I'm sure is going to be a terrific journey into the mind of someone I know very well: myself.  For my first entry I decided that I would cook something, since the way to anyone's heart is through their stomach.  I've been dying to make chili for a few weeks now, so I decided I would try to make it a bit healthier by substituting ground beef with ground turkey, and full fat cheese with reduced fat cheese (don't you feel SO much less guilty now?!).  Let us begin.


Turkey Chili
1 1/2 tablespoons olive oil
1 pound(ish) ground turkey
1 red onion (chopped)
1 (28 ounce) can of crushed tomatoes
1 (16 ounce) can of kidney beans- drained and rinsed
1 cup water
1 tablespoon garlic (minced)
2 tablespoons chili powder
1/2 teaspoon paprika
1/2 teaspoon oregano
1/2 teaspoon ground cayenne pepper
1/2 teaspoon ground cumin
1/2 teaspoon salt
1/2 teaspoon pepper
A dash of cinnamon
A dash of Sriracha (optional)
Reduced fat "Mexican" Cheese (optional, but delicious)


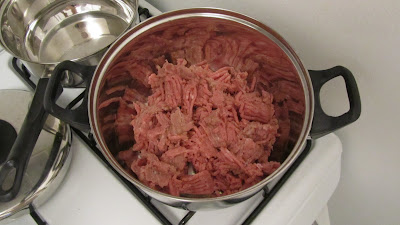
1. Heat oil in a large pot over low heat.  Break up ground turkey into small chunks while placing it in the pot.  Turn up the heat to medium once all of the turkey is in the pot.  Cook turkey until evenly brown.  Stir in onion, and cook for about 5 minutes.
2. Pour Water into the pot.  Mix in crushed tomatoes, kidney beans, and garlic.
3. In a separate small bowl, mix together the chili powder, paprika, oregano, cayenne pepper, cumin, salt, pepper, and cinnamon.  Pour the dry mixture into the pot, and stir.  Bring to a boil.  Turn the heat down to low, cover, and simmer for 30-35 minutes.
4. Serve chili in a decorative bowl, and finish with a couple dashes of Sriracha and a small fistful of cheese.
Servings per Recipe 8-10

 
This recipe is delicious during the cold winter months when you want to feel slightly like a lumberjack and a lady simultaneously.  I adore spicy foods, so I like to add about a tablespoon and a half of Sriracha to my chili bowl, but obviously to each his/her own.  Chili is terrifically filling and, if you live alone like I do, this chili will last you about a week (Unless you're sharing with friends!).     
Originally I made this chili while following this turkey chili recipe but I thought that there were a few flaws, like I only wanted to add one cup of water instead of two so the consistency would be thicker.  Also, I didn't want to mash up the kidney beans cause I enjoy eating them whole.  Lastly, I thought the dish needed a bit of zing, so I added Sriracha for spiciness and a dash of cinnamon to enrich the flavors.  Well, it's getting late, and I hear leftover chili calling my name. Byyyeeee!